
The Rain Dial manual provides essential guidance for installing‚ programming‚ and operating Rain Dial controllers‚ ensuring efficient irrigation management through automated or manual watering schedules.
1.1 Overview of Rain Dial Controllers
Rain Dial controllers are advanced irrigation systems designed for efficient water management. Available in C-Dial and I-Dial models‚ they offer flexibility for both indoor and outdoor installations. These controllers support multiple zones‚ allowing customization of watering schedules. With features like manual mode activation‚ they enable users to override automatic settings temporarily. The C-Dial is ideal for indoor use‚ while the I-Dial is built for outdoor durability. Both models ensure precise control over irrigation‚ making them suitable for residential and small-scale commercial applications. Their modular design and compatibility with sensors enhance functionality‚ providing a reliable solution for modern watering needs.
1.2 Importance of Manual Operation
Manual operation is crucial for precise control over irrigation systems‚ allowing users to test zones‚ adjust watering times‚ or activate zones outside scheduled programs. This feature ensures immediate response to unexpected conditions‚ such as wet soil or equipment issues‚ preventing water waste and potential damage. Manual mode does not alter programmed schedules‚ providing flexibility without disrupting automated routines. It is particularly useful for troubleshooting‚ ensuring all zones function correctly before relying on automatic settings. This capability enhances system reliability and adaptability‚ making manual operation an essential tool for effective irrigation management.

Key Features of Rain Dial Controllers
Rain Dial controllers offer versatile irrigation management with models like C-Dial and I-Dial‚ supporting 4 to 12 zones. They feature indoor/outdoor installation options‚ modular design‚ and remote compatibility for enhanced functionality.
2.1 C-Dial and I-Dial Models
The C-Dial and I-Dial models are designed for different applications. The C-Dial is ideal for indoor installations‚ supporting 4 to 6 stations‚ while the I-Dial is built for outdoor use‚ offering 4‚ 6‚ or 8 stations. Both models feature modular designs‚ allowing for easy upgrades and customization. The I-Dial is available with 24V or 9V solenoids‚ providing flexibility for various irrigation systems. These models ensure reliable performance‚ catering to both residential and small commercial needs with their durable construction and user-friendly interfaces.
2.2 Indoor and Outdoor Installation Options
Rain Dial controllers offer versatile installation options‚ catering to both indoor and outdoor setups. Indoor models are designed for protected areas‚ ensuring safety from weather conditions‚ while outdoor models are built to withstand harsh environments. The C-Dial is typically used indoors‚ while the I-Dial is suitable for outdoor installations. Both models come with mounting templates for easy setup. Indoor controllers are ideal for central locations‚ providing easy access for programming. Outdoor controllers should be installed in shaded areas to prevent overheating. This flexibility allows users to choose the most convenient and practical installation method for their irrigation needs.

Installation and Setup
Use a mounting template to install the Rain Dial controller in a protected area‚ ensuring easy setup and access for programming and adjustments.
3.1 Mounting the Controller
Mounting the Rain Dial controller securely is crucial for reliable operation. Use the provided mounting template to locate the optimal position‚ ensuring the controller is level and accessible. For indoor models‚ choose a dry‚ protected area away from direct sunlight. Outdoor models should be installed in a sheltered spot to avoid weather exposure. Attach the controller firmly using screws or anchors to prevent movement. Ensure all wires and valves are within reach for easy connection. Proper mounting ensures stability and longevity of the device‚ allowing for seamless irrigation control and adjustments as needed.
3.2 Connecting Valves and Wires
Connect the valves and wires to the Rain Dial controller by first identifying the correct terminals on the terminal block. Ensure all wires are securely fastened to avoid loose connections. For valve wires‚ match each wire to the corresponding zone terminal. Use the provided wiring diagram as a reference. Insert the batteries correctly‚ ensuring proper polarity to power the controller. Once connected‚ test the system by manually activating each zone to confirm proper operation. This step ensures the controller communicates accurately with the valves‚ allowing for precise irrigation control and scheduling functionality.

Programming the Rain Dial Controller
Program the Rain Dial controller by setting watering schedules‚ start times‚ and durations. Use the dial to select zones and adjust settings for personalized irrigation management.
4.1 Setting Watering Schedules
To set watering schedules on the Rain Dial controller‚ access the scheduling menu by turning the dial to the desired program. Select the zone or station you wish to configure. Choose the start time and duration for watering‚ adjusting as needed to suit your irrigation needs. You can set multiple start times per day for flexible watering management. Use the dial to navigate through options and confirm settings. The controller allows for daily‚ every other day‚ or custom schedules‚ ensuring efficient water usage and tailored irrigation plans for your lawn or garden.
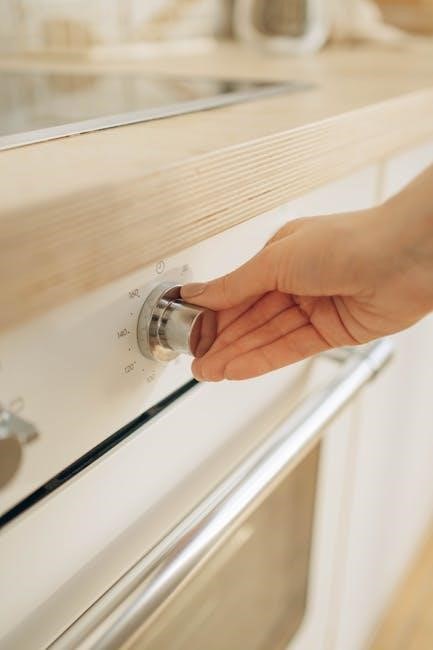
4.2 Manual Mode Activation
To activate manual mode on the Rain Dial controller‚ switch the function dial to the Run/Manual position. This allows you to manually operate selected zones without altering the programmed schedule. Use the dial to choose the desired station‚ and set the run time as needed. The display will show the selected zone‚ remaining time‚ and manual mode indicator. To stop manual operation‚ simply move the function switch to the Off position or press the Manual button again. This feature is ideal for occasional watering needs outside the automatic schedule.
Operating Modes
The Rain Dial controller offers multiple operating modes‚ including automatic‚ semi-automatic‚ and manual‚ allowing users to customize watering schedules and activate zones as needed without disrupting programmed settings.
5.1 Automatic vs. Semi-Automatic Modes
The Rain Dial controller offers both automatic and semi-automatic modes for flexible irrigation management. In automatic mode‚ the controller runs pre-set schedules without manual intervention. Semi-automatic mode allows users to manually start cycles while retaining programmed settings. This dual functionality ensures that users can adapt watering schedules to specific needs without altering the overall program. The modes are easily switched using the function switch‚ providing convenience and control over irrigation operations. This feature is particularly useful for adjusting watering times based on weather conditions or seasonal changes.
5.2 Run/Manual Mode Explanation
The Run/Manual mode allows users to manually operate selected stations for a specific runtime. Set the Function switch to “Run‚” then turn the Dial to the desired station number; Manual mode enables temporary adjustments without altering programmed schedules‚ ideal for testing or one-time watering. This feature ensures precise control over irrigation cycles‚ offering flexibility for varying conditions. The controller returns to automatic mode after manual operation‚ maintaining programmed settings seamlessly;
Maintenance and Troubleshooting
Regular maintenance ensures optimal performance. Check wiring connections‚ clean sensors‚ and inspect valves for proper function. Troubleshooting involves resetting to factory defaults or addressing common issues like water leaks.
6.1 Common Issues and Solutions
Common issues with Rain Dial controllers include water leaks‚ faulty sensors‚ or unresponsive buttons. To address leaks‚ inspect and replace worn-out valves. For sensor malfunctions‚ ensure proper installation and calibration. If buttons aren’t responding‚ reset the controller by turning the dial to the “Off” position and back. Additionally‚ check wiring connections for any damage or corrosion. Resetting to factory defaults can resolve programming errors. Always refer to the manual for specific troubleshooting steps to maintain optimal performance and extend the lifespan of your irrigation system.
6.2 Resetting to Factory Defaults
To reset your Rain Dial controller to factory defaults‚ press and hold the “Manual” button while turning the dial to the “Off” position. Release the button‚ then turn the dial back to “Auto.” This clears all custom settings‚ restoring default schedules and configurations. Note that this erases saved data‚ so reprogramming will be necessary. If issues persist‚ power-cycling the controller may also be required. Always refer to the manual for detailed instructions to ensure proper reset and maintain system functionality.
Remote Control Compatibility
Rain Dial controllers are compatible with remote sensors and devices‚ enhancing functionality through seamless integration with rain‚ freeze‚ and soil moisture sensors for optimal irrigation control.
7.1 Enhancing Functionality with Sensors
Integrating sensors with Rain Dial controllers optimizes irrigation efficiency. Rain and freeze sensors automatically pause watering during unfavorable conditions‚ while soil moisture sensors adjust schedules based on ground conditions. These devices ensure water is used responsibly‚ preventing overwatering and reducing waste. Compatibility with various sensor models allows for tailored systems‚ improving overall performance and adapting to environmental changes. This advanced integration enhances the controller’s functionality‚ making it a versatile solution for modern irrigation needs. Sensors work seamlessly with both indoor and outdoor models‚ ensuring optimal watering regardless of weather or soil status.
7.2 Integration with Rain/Freeze Sensors
Integrating Rain/Freeze sensors with Rain Dial controllers enhances irrigation efficiency by automatically halting watering during rain or freezing temperatures. These sensors prevent overwatering and protect the system from damage caused by ice formation. Compatible models like RS500‚ RS1000‚ or RFS1000 seamlessly connect to the controller‚ ensuring water conservation and system longevity. The sensor’s input overrides the controller’s schedule‚ pausing operations when conditions are unfavorable. This integration is particularly useful in climates with frequent rainfall or cold snaps‚ ensuring optimal watering while reducing waste and potential damage to the irrigation system.